# Resizing single volume group and logical volume after disk expansion
This guide is used after cloning to a increased size disk such as 500GB to 1TB, or by having some space left over from installing the OS, such as the rest of the disk but only 50GB allocated to the / partition.
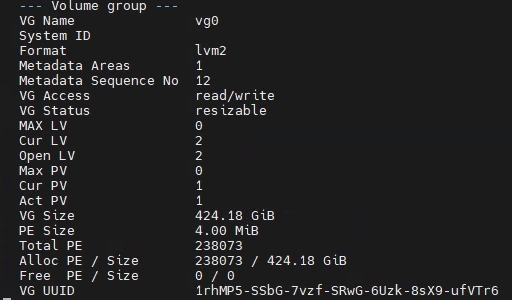
Firstly run **vgdisplay** to get the volume group information.
Run **lsblk** and notice that the size of the partition on the disk **and** the volume group is 424G, not the 931.5G.
**Note:** *After resizing, it will be a bit smaller than the disk as the other partitions take it up, so around 926G at the end*

Let's add the rest of the free space to the partition first. Run **cfdisk /dev/nvme#n1**, replacing hashtag with drive number. No need for a partition here as we need to do changes on the disk itself.
*I should have an image here of CF Disk at some point when I have a free size again.*
Go down to partition 3 (Or where your logical volumes are stored for expansion) and chose "Resize". Just put in the amount you wish to add to that partition (which is presumably max), then write it.
 

Once you've done this, run **pvresize /dev/nvme#n1p#**, replacing both the hashtags respectively.

Next run **lvextend -l +100%FREE /dev/vg#/LOCATION**, replacing the hashtag with the volume group number, normally vg0, and location with the mountpoint name, normally "root". An example:
*This will say resized. I don't have an image currently of this.*

Once done, run **resize2fs /dev/vg#/LOCATION**, replacing the values again with the relevant fields.
*This will say "online sizing required" and resize.*

Run **df -h** and **lsblk** to confirm resizing.
