# Adding Additional Ports To Your Pterodactyl Nodes

<span style="color: rgb(0, 0, 0);">Head over to your Pterodactyl panel and go to the admin side which is the button in the top right corner, a cog icon.</span>

<span style="color: rgb(0, 0, 0);">![](https://jasmeow.pics/AX9tif.png)</span>

<span style="color: rgb(0, 0, 0);">Click on "Nodes" along the left hand side.</span>

<span style="color: rgb(0, 0, 0);">![](https://jasmeow.pics/YePnpw.png)</span>

<span style="color: rgb(0, 0, 0);">In the node list, click on the blue text. Normally, you will only have one node called "S01" for Server 01, but choose which one you want to add an allocation to.</span>

<span style="color: rgb(0, 0, 0);">![](https://jasmeow.pics/Ce4KrG.png)</span>

<span style="color: rgb(0, 0, 0);">Click "Allocation" along the top bar.</span>

<span style="color: rgb(0, 0, 0);">![](https://jasmeow.pics/HiQLgY.png)</span>

<span style="color: rgb(0, 0, 0);">In the allocation table, you will see on the right a "Assign New Allocations" header.</span>

<span style="color: rgb(0, 0, 0);">![](https://jasmeow.pics/A8V9xW.png)</span>

- <span style="color: rgb(0, 0, 0);">For the *IP Address*, if you want it externally, put in the external IP. Only do this if you are setting up the proxy for external player connections or voting incoming connections. Alternatively, you would do this if you are making another server such as a modpack server from Forge/Fabric, as this won't be able to connect to your proxy normally and has to be a standalone server. </span><span style="color: rgb(0, 0, 0);">This is normally done for you so you shouldn't need to worry about it. In most cases, you will put *172.18.0.1* as this is internal, and would be used for internal proxying of players, votifier forwardings, dynmap redirections for vhost nginx redirects and so fourth. You would also use an internal IP for internal services such as hosting a Discord bot as that doesn't need external connections inwards but only outwards.</span>
- <span style="color: rgb(0, 0, 0);">For the *IP Alias*, this is helpful for disguising the external or internal IP's on the normal panel side if some of your staff are not administrators so that helpers/moderators/developers don't see the backend IP address or internal ones causing a potential breach if shared.</span>
- <span style="color: rgb(0, 0, 0);">![](https://jasmeow.pics/akoKhD.png)</span>
- <span style="color: rgb(0, 0, 0);">For the *Ports,* choose wisely and follow an order to save time later on. For example, we do *172.18.0.1* as the IP and *25566-25575* as the ports, as we can then use the 10 internals for Hub, Survival, etc and the public IP on port *25565* for the proxy to prevent proxy spoofing. For other services like bots, we just put them somewhere where they aren't going to be clashing with future projects, such as on ports 4000, 5000, etc.</span>

<p class="callout info align-left"><span style="color: rgb(0, 0, 0);">When using more than one dedicated system, the *IP Address* can be different, dependent on your network infrastructure, so ask the team before continuing if you are confused. For example, your internal networking could be 10.10.10.1 to 10.10.10.5, each dedicated system being an IP in that range.</span></p>

<span style="color: rgb(0, 0, 0);">In our case, we did 10.10.10.1 with alias "DiscordBot" to hide from non admins on port 3000. We click the green "Submit" button.</span>

<span style="color: rgb(0, 0, 0);">![image.png](https://docs.jasmeow.systems/uploads/images/gallery/2023-06/scaled-1680-/JigXMxOzisYwxizL-image.png)</span>

<span style="color: rgb(0, 0, 0);">
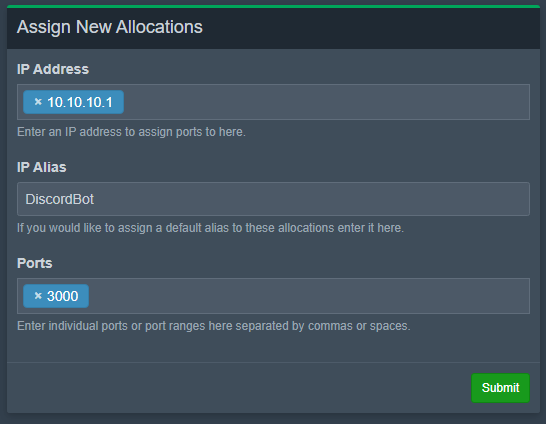
If you get the this error, Make sure you choose a port over 1024 as these are restricted to root level access only. </span>

<span style="color: rgb(0, 0, 0);">![image.png](https://docs.jasmeow.systems/uploads/images/gallery/2023-06/scaled-1680-/xj31eZcbDaHBHvJJ-image.png)</span>

<span style="color: rgb(0, 0, 0);">If you get either below error, make sure you actually filled out an IP in the *IP Address* box or a port in the *Ports* box!</span>

<span style="color: rgb(0, 0, 0);">![](https://jasmeow.pics/h1JOvZ.png) ![](https://jasmeow.pics/DGLpkT.png)</span>

<span style="color: rgb(0, 0, 0);">If successful, you will get the below success message.</span>

<span style="color: rgb(0, 0, 0);">![](https://jasmeow.pics/5w7K8M.png)</span>

<span style="color: rgb(0, 0, 0);">You can delete an allocation by clicking the red bin icon in the allocations table on the left.</span>

![image.png](https://docs.jasmeow.systems/uploads/images/gallery/2023-06/scaled-1680-/6XLxvsYv3sqg8BDb-image.png) ![](https://jasmeow.pics/LZbvjx.png) ![](https://jasmeow.pics/QcMY5K.png)

<span style="color: rgb(0, 0, 0);">You can also bulk remove them by ticking them along the left, then scrolling back up to the top and clicking "Mass Actions" top right, and pressing "Delete." </span>

![image.png](https://docs.jasmeow.systems/uploads/images/gallery/2023-06/scaled-1680-/jekZDIPFt6QKs1Wh-image.png) ![image.png](https://docs.jasmeow.systems/uploads/images/gallery/2023-06/scaled-1680-/GrBvnIg5DYssboT3-image.png) ![](https://jasmeow.pics/lyeoCB.png) ![](https://jasmeow.pics/ItH6TJ.png)

<span style="color: rgb(0, 0, 0);">
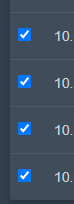
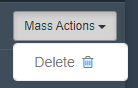
Now when you go to "Servers" on the left sidebar and "Create New" on the top right, you can now select which node to use and your port will appear there.</span>

<span style="color: rgb(0, 0, 0);">![image.png](https://docs.jasmeow.systems/uploads/images/gallery/2023-06/scaled-1680-/sSzfD7nO4PdjgqGx-image.png) ![](https://jasmeow.pics/aE6dy3.png)</span>

<span style="color: rgb(0, 0, 0);">![](https://jasmeow.pics/h0sunH.png)</span>

<span style="text-decoration: underline; color: rgb(0, 0, 0);">**Adding ports to existing servers**</span>

<span style="color: rgb(0, 0, 0);">Go to the Admin Side &gt; Servers &gt; Click a server &gt; Build Configuration.</span>

<span style="color: rgb(0, 0, 0);">![image.png](https://docs.jasmeow.systems/uploads/images/gallery/2023-12/scaled-1680-/nafhNLkamYyyquNC-image.png)</span>

<span style="color: rgb(0, 0, 0);">
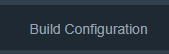
In the bottom right, there is a section called "Allocation Management". Each option is self explanatory.</span>

<span style="color: rgb(0, 0, 0);">![](https://jasmeow.pics/6G7kYw.gif)</span>